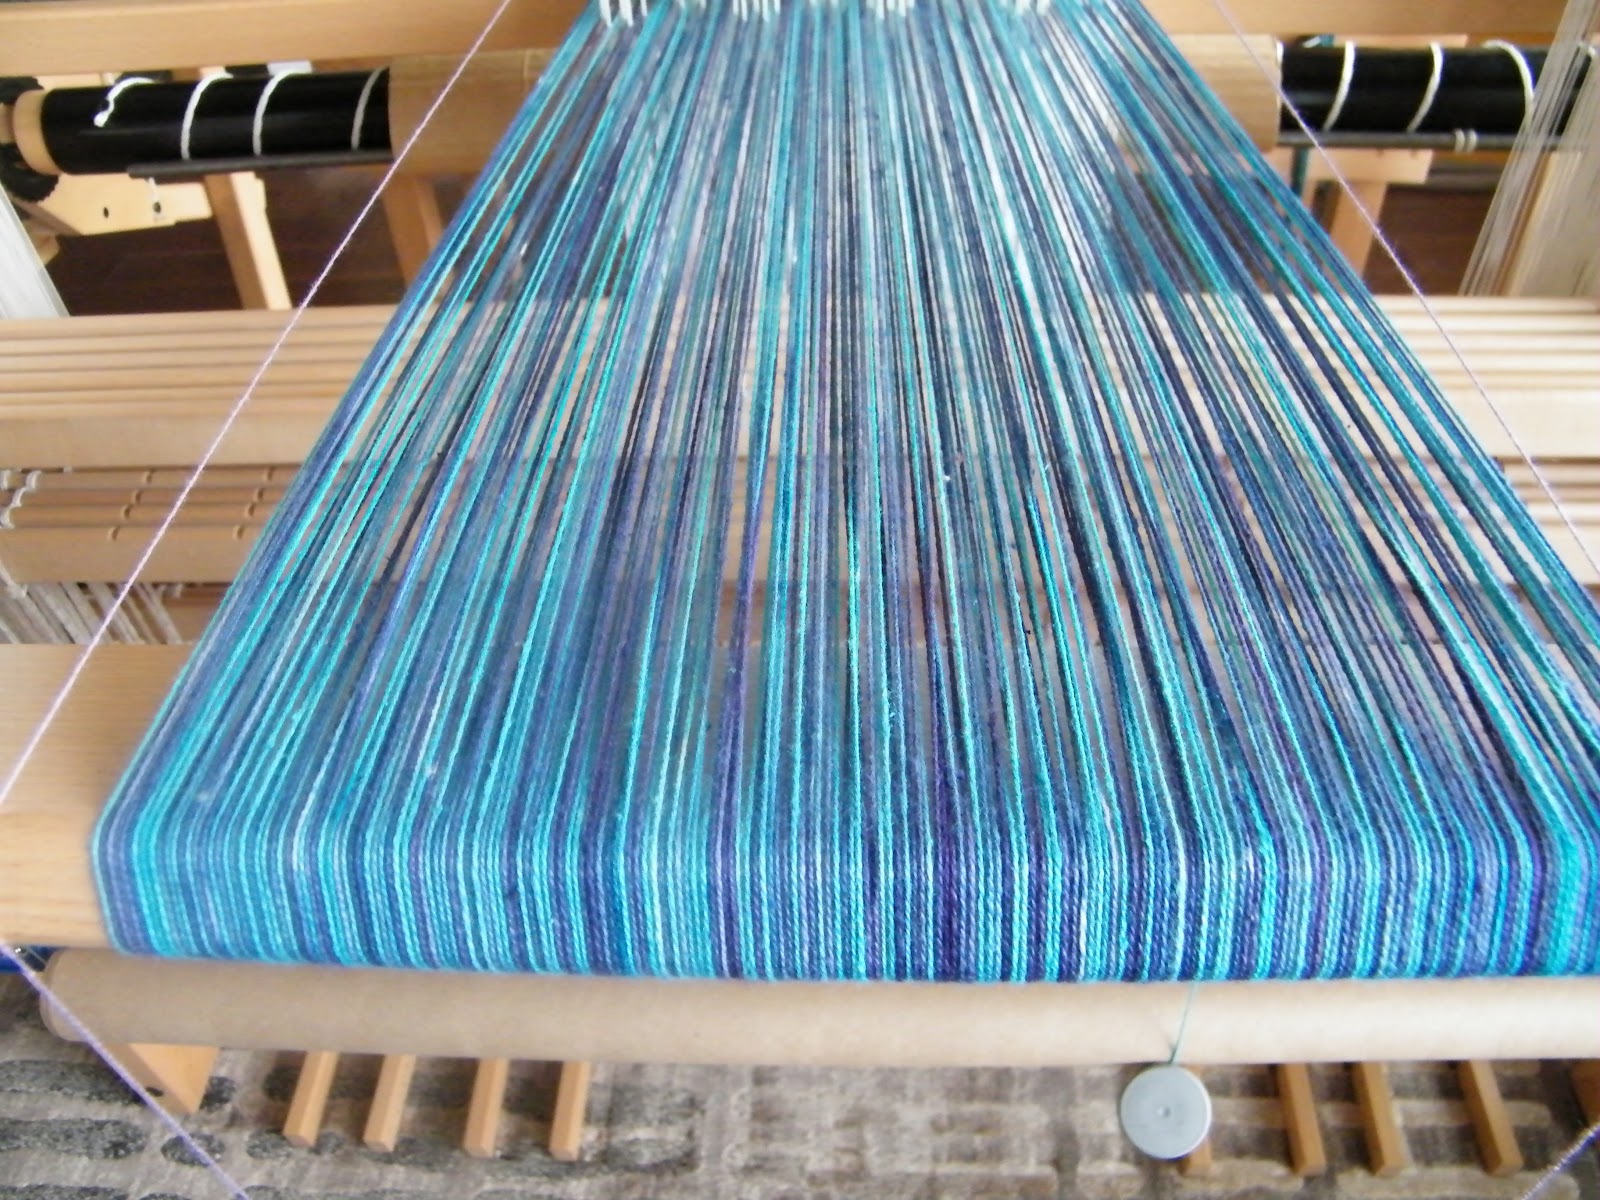
It is amazing how different the two scarves look and feel. Both of the scarves are 2/8 hand dyed cotton warp with some 2/8 Orlec on the edges. The weft for both scarves was 2/8 Orlec in two different shades of blue.
The first scarf was woven with large lace blocks and the pale blue weft. The pale weft really disappears into the background of this scarf letting the variations of the warp to show off. I really like the look of Finnish Lace.
When I pulled the scarves off the loom I noticed that the darker scarf had quite a lot of texture. I really liked the feel of it but I wasn’t sure how the finishing was going to turn out.
After washing and a good hard press the pebbly texture hasn’t totally disappeared but it has been greatly reduced. The scarf was woven with small lace blocks and a darker blue weft.
These scarves have a fantastic drape to them. Using Orlec for the weft really lightened up the weight of the scarves. The Orlec also gives the scarves great shine. These scarves were really fun and quick to weave!
Saturday, April 21, 2012
Sunday, April 15, 2012
Seeing blue again
I also did a set of hand dyed Blue cotton scarves. I used a large skein of hand dyed blue and the last bit of the skein of half navy/ half blue that Mum used for her scarves. I pulled the warp for the scarves in three sections because I was unsure if I would have enough of the hand dyed cotton.
Well my math was wrong and I came up short so I needed to add a couple of extra threads on the edges. I used Orlec in turquoise and a navy, I was able to use all the blue hand dyed cotton up and that was the point!
For the first scarf the weft is a pale blue/grey Orlec and the pattern is Finnish Lace. The blocks are large, about 1.5 inches. I have forgotten how much I liked this draft; I originally did this pattern as a table runner.
Well my math was wrong and I came up short so I needed to add a couple of extra threads on the edges. I used Orlec in turquoise and a navy, I was able to use all the blue hand dyed cotton up and that was the point!
For the first scarf the weft is a pale blue/grey Orlec and the pattern is Finnish Lace. The blocks are large, about 1.5 inches. I have forgotten how much I liked this draft; I originally did this pattern as a table runner.
These scarves wove up really fast, the only photo I have of the second scarf is at the just off the loom one! The second scarf has smaller blocks and the weft is a darker blue Orlec.
I really enjoyed weaving these scarves. The planning of the warp was the hardest part to use up all the hand dyed blue cotton. I can't wait to see them finished!
Thursday, April 5, 2012
Finished Stash Busting Scarves
My Stash Busting scarves have finally been steam pressed and they look so much better for it! I love this photo! If you look very closely you can see the seed beads that I've added to the selvedge edges to give just a wee bit of shine. I wanted to keep these scarves very casual ~ perfect for jeans.
The first scarf I did had a lavender mercerized cotton as the weft and the turquoise and purple really pop!
The second scarf had pale blue weft and suddenly the stripes in the warp appeared!
How can something essentially the same, become so different?
These scarves are definately one of a kind and I hope they find a new home soon...
We've had a some amazing Spring weather lately and this is the photo of our cul-de-sac....I swear the mountains are moving closer by the day!
The first scarf I did had a lavender mercerized cotton as the weft and the turquoise and purple really pop!
The second scarf had pale blue weft and suddenly the stripes in the warp appeared!
How can something essentially the same, become so different?
These scarves are definately one of a kind and I hope they find a new home soon...
We've had a some amazing Spring weather lately and this is the photo of our cul-de-sac....I swear the mountains are moving closer by the day!
This is the Beaufort Range and it is across Comox Harbour on the mainland. The tree in the forefront is in our front garden.
Even though the snow is still pretty close to us, we've started our tomato and chili pepper crop. Here they are in the master ensuite....it has the most amazing light with two huge windows and a sky light...a perfect place for germination. Starting the seeds in the egg shells is really cute and environmentally very friendly. When the plants are ready for transplanting, we'll just crush the shells in our hands and pop them into the soil.
Labels:
Finished Project,
Finishing,
Gardening,
Weave Structure
Tuesday, March 27, 2012
Another Really Good Day
Even though I just blogged yesterday I'm so excited I've got share! The March/April issue of Handwoven Magazine is out and I have a project featured on pages 46-47 and 48! I can't believe I got three whole pages!
Interweave returned my scarves along with a copy of the newest issue of Handwoven by FedEx this afternoon and now I can do a wee bit of tooting my own horn!
If you don't get the magazine you can see my Paper Spot Scarves on Weaving Today (link below) and by scrolling down until you see the photo of the scarves which have been so beautifully photographed draped over a chair...
http://www.weavingtoday.com/blogs/handwoven-issues/archive/2012/03/22/Handwoven-March-April-2012.aspx
It was so hard not share the project while I was weaving it last summer, but the reward of having it published in the 'benchmark magazine' is truly uplifting for me and it really makes me want to sit at the loom and try out new weave structures.
I've just noticed that the first project of mine that Handwoven published last year had the same page numbers! I guess I'm a middle of magazine kinda gal!
Interweave returned my scarves along with a copy of the newest issue of Handwoven by FedEx this afternoon and now I can do a wee bit of tooting my own horn!
If you don't get the magazine you can see my Paper Spot Scarves on Weaving Today (link below) and by scrolling down until you see the photo of the scarves which have been so beautifully photographed draped over a chair...
http://www.weavingtoday.com/blogs/handwoven-issues/archive/2012/03/22/Handwoven-March-April-2012.aspx
It was so hard not share the project while I was weaving it last summer, but the reward of having it published in the 'benchmark magazine' is truly uplifting for me and it really makes me want to sit at the loom and try out new weave structures.
I've just noticed that the first project of mine that Handwoven published last year had the same page numbers! I guess I'm a middle of magazine kinda gal!
Monday, March 26, 2012
Stash Busting Cotton Scarves
I’m working diligently on busting my stash which now hides itself in my guest bedroom closet! My sister-in-law will be visiting in the summer and it would probably be a good idea if she had somewhere to hang her hat! So the stash must be diminished!
In the summer of 2010 I was playing around with Procion MX dyes and painted a skein of natural unmercerized 2/8 cotton half turquoise and half navy. This photo was taken in my old house....and frankly I really miss having a seperate kitchen where I could hide away my dyeing messes!
This is the resulting skein….really beautiful! The plan for this stash buster is for two canvas weave scarves, each about 70 inches long.
After pulling the 5-1/2 yard warp for the two scarves, this is all the yarn I have left! I know, really, really cutting it close!
I was surprised at how variegated the warp turned out; and surprisingly there seems to be quite a bit of purple in it, although I have no idea where that came from!
This is the first of the two scarves, I’ve crossed it with 2/8 mercerized cotton in pale lilac and have woven the blocks just over two inches in length.
Here are both scarves just off the loom before wet finishing, so they really aren't looking their best right now. I crossed the second scarf with 2/8 orlec in pale porcelain blue and wove the blocks about three inches in length. Both scarves have been hem stitched to fix the hem and I've allowed ten inches unwoven for the twisted fringe. The scarves were just over eight inches wide on the loom.
I'm quite amazed at the way the stripes have appeared on the blue scarf, but not very much on the lilac scarf.
I really liked this easy six shaft weave so I have decided to change up the pattern blocks and the treadling and weave another batch of scarves using another dye day skein.
I'll post photos of the scarves when I finally get them washed, beaded and pressed.
In the summer of 2010 I was playing around with Procion MX dyes and painted a skein of natural unmercerized 2/8 cotton half turquoise and half navy. This photo was taken in my old house....and frankly I really miss having a seperate kitchen where I could hide away my dyeing messes!
This is the resulting skein….really beautiful! The plan for this stash buster is for two canvas weave scarves, each about 70 inches long.
After pulling the 5-1/2 yard warp for the two scarves, this is all the yarn I have left! I know, really, really cutting it close!
I was surprised at how variegated the warp turned out; and surprisingly there seems to be quite a bit of purple in it, although I have no idea where that came from!
This is the first of the two scarves, I’ve crossed it with 2/8 mercerized cotton in pale lilac and have woven the blocks just over two inches in length.
Here are both scarves just off the loom before wet finishing, so they really aren't looking their best right now. I crossed the second scarf with 2/8 orlec in pale porcelain blue and wove the blocks about three inches in length. Both scarves have been hem stitched to fix the hem and I've allowed ten inches unwoven for the twisted fringe. The scarves were just over eight inches wide on the loom.
I'm quite amazed at the way the stripes have appeared on the blue scarf, but not very much on the lilac scarf.
I really liked this easy six shaft weave so I have decided to change up the pattern blocks and the treadling and weave another batch of scarves using another dye day skein.
I'll post photos of the scarves when I finally get them washed, beaded and pressed.
Friday, March 16, 2012
Winning by a Mile
So after the frustration of the multiplely woven first inch, the runners are done!
The warp is 2/8 orlec in rust and 2/8 cotton in straw, the weft is 2/8 orlec in rust. To help design the placement of the circles on the runner I cut out little pieces of paper the correct size and then I play with the paper. It really helps to be able to actually ‘see’ the final result. I sat down with my tape measure and tried lots of different design placements; I decided to go with ‘more circles the better’ placement!
The runners had a tendency to draw in so I had to use a temple. I got into a good rhythm of weaving with the temple that I barely noticed the interruption of moving the temple. So much so that I didn’t take any photos of the runners on the loom!
After removing the runners from the loom I like to braid the fringe loosely before washing. It was a good idea in this case because of the two different fibres in the warp. The cotton shrunk more than the orlec and that would have definitely made a twisted fringe wonky. And there is nothing worse than pullingn out an already twisted fringe; that's a long and tedious task!
I really like how these runners turned out. I designed them to go across the shorter width of the table so they could also be used as place mats. The runners only got a quick press with the iron so I could take photos for the blog, they will be steam pressed soon and that makes a world of difference.
The runners are dual sided and they are stunning either side. Although I think that the red side is more exciting because of the dramatic colour and the shine from the orlec.
The gold side looks quite different from the red side; it is almost hard to believe that it is the same runner!
I really like these runners and they are something that I will be doing again.
The warp is 2/8 orlec in rust and 2/8 cotton in straw, the weft is 2/8 orlec in rust. To help design the placement of the circles on the runner I cut out little pieces of paper the correct size and then I play with the paper. It really helps to be able to actually ‘see’ the final result. I sat down with my tape measure and tried lots of different design placements; I decided to go with ‘more circles the better’ placement!
The runners had a tendency to draw in so I had to use a temple. I got into a good rhythm of weaving with the temple that I barely noticed the interruption of moving the temple. So much so that I didn’t take any photos of the runners on the loom!
After removing the runners from the loom I like to braid the fringe loosely before washing. It was a good idea in this case because of the two different fibres in the warp. The cotton shrunk more than the orlec and that would have definitely made a twisted fringe wonky. And there is nothing worse than pullingn out an already twisted fringe; that's a long and tedious task!
I really like how these runners turned out. I designed them to go across the shorter width of the table so they could also be used as place mats. The runners only got a quick press with the iron so I could take photos for the blog, they will be steam pressed soon and that makes a world of difference.
The runners are dual sided and they are stunning either side. Although I think that the red side is more exciting because of the dramatic colour and the shine from the orlec.
The gold side looks quite different from the red side; it is almost hard to believe that it is the same runner!
I really like these runners and they are something that I will be doing again.
Sunday, March 11, 2012
Orchid Shawl Finally Done
I've finally finished the rayon, novelty shawl that I wove a few weeks ago. I just couldn't seem to find the time to sit down and finish the fringe, so there it sat in an untidy pile in the spare room!
When the shawl came off the loom it was quite stiff and held onto the wrinkles ~ I had some doubts whether it would have the drapability I wanted after washing, luckily it did. I don't twist my fringes before I full my fabric anymore; I found that I was having to reknot some of the fringes because of uneven shrinkage and since it's a job I don't like at the best of times, I'd rather do it just once. So I just gather groups and do a loose braid, then I wash the items as usual.
After washing, while the item is still wet, I undo each braid and finger comb the fringes straight. You can see that they come out of the braid really easily.
Because there are different fibres and colours and denting groups I've done the fringe in uneven twizzles on this shawl. The groups of 4 novelty threads are twisted by themselves. Then there are groups of rayon with 4 threads per group and a single group in the middle with 6 threads. This happened because between each group of novelty threads I had 38 rayon threads and in 2 per dent in a 10 dent reed ~ well, you get the picture. Rather than see this as a problem I see it as a 'design feature' and as long as it's a constant repeating feature in the shawl I like it.
This shawl has beautiful drape and the fringes look lovely.
There is a slinky weight that just feels wonderful!
This photo is from the front page of our local newspaper the Comox Valley Record and these are herring in the channel between Vancouver Island and Denman Island! There are so many herring in this run that they have made the water a light green and they actually make the water froth a bit....what an amazing site! Needless to say the sealions and gulls are everywhere and having a field day!
Subscribe to:
Posts (Atom)