Showing posts with label Gaywool Dye. Show all posts

Monday, June 30, 2014

Clearing the Handspun Decks

Weaving hasn’t been consuming all of my time lately ~ I’ve reconnected with my Lendrum Spinning wheel and I’m truly enjoying it!

Before I could spin the Louet silk that I dyed a few weeks ago, I had to empty up some bobbins that had been languishing for yonks.
I believe that this single on the bobbin is spun from a colourway called Teddy Bear and frankly I can’t remember if Susan gave it to me or if I bought it at a spinning day….either way it was just taking up a bobbin and looking very stripey.Teddybear merino wool is spot dyed brown and pink with cream and a bit of yellow and when I spun it I got a nice long marl moving from cream to brown to pink in every possible permutation.

I didn’t want to lose that beautiful transition and if I plied it with itself I would tone the whole thing down and blah it out I think.
I chose to ply it with this super fine cashmina which is a wool and cashmere blend.
Because the cashmina is very, very fine compared to the handspun merino wool, I got a really great spiral yarn.
I’m really happy with the result!
After freeing up my spinning wheel; I now have all of the silk spun and plied with itself.
The effect is an all over pale pink.
But when you look closely you can see a bit of orange and cream.  I think I’ll use it as weft for a scarf.
After all that spinning I was really stoked about weaving with silk and so a few days ago I warped up this hand painted silk.  The silk was painted with ProcionMX in Old Gold and Yellow so it is very sunshiny and I'm ready to weave!

Wednesday, June 4, 2014

Dyeing Louet Fibre with Gaywool Dye ~ Part 2

Finally the continuation of Dyeing Louet Silk Top with Gaywool dye story.  I was trying to get enough silk spun for the final photo and the sunny days kept pulling me outside, hence the lengthy delay!
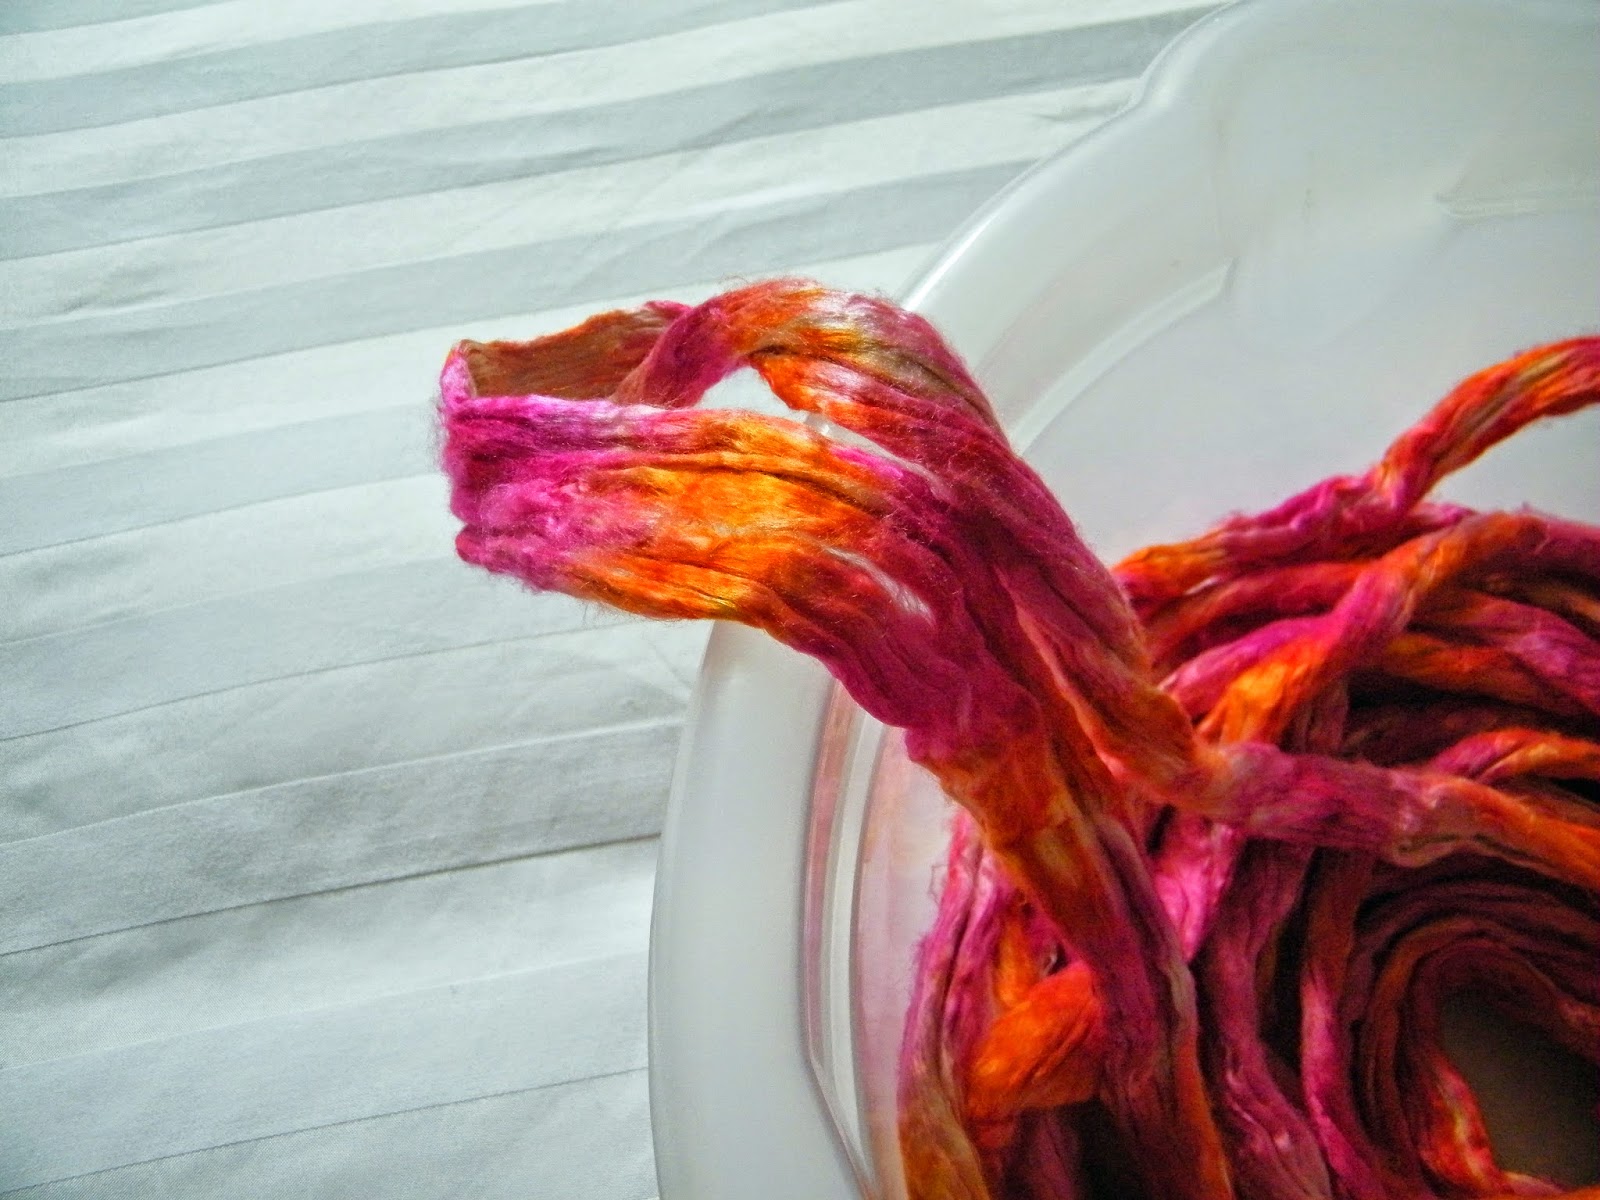
After waiting for 24 hours to allow the dyes to penetrate the silk I unwrapped the plastic wrap to finally get to see the result of my dye sprinkling. I removed it from the plastic wrap and coiled into a bowl for rinsing.
The first rinse had a bit of extra dye, but surprisingly not that much.  Most of the very liberally sprinkled dye has done it’s job and coloured the silk beautifully.
I must admit that I loved the colour of the water as I poured it off!
After I rinsed the silk out completely I laid it on a towel covered drying rack in the shade to dry which took about 6 hours in our marine climate.
I’m really impressed with the colours now that it’s dry enough to spin.
I had planned to have some undyed sections of silk, but I see that I should have opened up the silk roving just a bit more when I was applying the dye.  The dye took beautifully on one side but didn't seep all the way to the center of the roving.
Finally I’m ready to spin, and don't you just love my nifty plastic bag apron?  I find that silk fibres stick to my regular cotton spinning apron so a clear plastic bag does the trick!
I pull off a section of roving about 18 inches long and gently tug the sections between my fingers all along the length. This opens up the fibre enough to make the silk fibres moved easily as I spin.
I’m really pleased with the colours as I’m filling the bobbin ~ a lovely marled pastel pink and coral is what I’m seeing right now, but I’m sure the effect will change when I ply it.  I’m aiming for a 20/2 grist for weaving, so this is quite a fine yarn.

Wednesday, May 21, 2014

Dyeing Louet Fibre with Gaywool Dye

Don’t you just love it when a ‘box of happy’ is delivered to your door?  I got mine a few days ago from Louet!

I received a half pound of Merino Silk 80/20 Top fibre in Natural and the same again in  Black; you can clearly see the silk running through the black Merino so you know it is soft, soft, soft!  I also received a half pound of Tussah Silk Top which started calling to me right away!
Tucked into the box were four Gaywool dyes and the full range of dye sample cards, now I have everything I need to add some pizzaz to the silk! Although Gaywool dyes were developed specifically for wool, they work on any protein fibre ~ like mohair, silk and alpaca.
I measured four ounces of Tussah Silk top from the bag.  My first task is to get it saturated with water so I coiled the silk into a plastic tub to keep the silk fibres aligned and to make it easy to find the end.
There are yards and yards of silk so I needed to make a double layer, I used my laundry mesh bag between the layers just to keep it all from clumping together.
Because the silk wants to float, it needs to be weighed down and I used a couple of plastic containers filled with water to keep the silk under the water.
I left the silk overnight to make sure it was really saturated and the next day I squeezed out all of the excess water. I moved everything out to the garage and donning gloves I made up a solution of 4 cups of water with 1.4 ounces of urea and 3/4 cup of white vinegar and slipped the silk into the bowl.  I left it soak while I got my dyeing area set up in the garage.
I used this very light weight plastic sheeting to cover my work area.  I use a half sheet of plywood on sawhorses and it is a perfect height for me!
After about a 20 minute soak I squeezed out the silk (wearing gloves) and I laid it on the plastic in long ribbons.  I spent the time to flatten it out a bit to get as much surface area exposed as I could.
I measured out about 2 teaspoons of Cyclamen Gaywool dye and the same amount of Citrus into separate plastic cups.  (You see the prototype of the warping mill my husband is making me in the background on his workbench, but that's another story!)
Now I am ready to dye ~ really ~ that joke never gets old!  I sprinkled the dye in small alternating bands directly onto the still moist silk.  I purposely left some areas without dye so that I can get some colour blending and natural sections.
I used a little squeeze bottle with some of the urea, vinegar and water mixture from the soak to wet the dyes enough so that I could work the colour into the silk with my fingers.
I then turned the silk over and repeated the whole process on the other side.
Because I’m using a variation on the Rainbow dyeing method, all I have to do is to fold the plastic sheet from the table over the silk to encase it.
And roll it up!  Jobs a goodun’! 
 Just to be on the safe side I’ve put the silk roll into a plastic bowl to age for the next 24 hours.  I can't wait to see what it looks like tomorrow!