Monday, October 26, 2020

Garden Shed to Garden Room

Staying very close to home this summer was just the impetus we needed to jump in and make a huge change to our back garden.  When we first bought the house in 2012 my husband built this lovely garden shed in the flattest spot in our garden.

This also proved to be the sunniest spot in our garden.  Our house has a lovely back patio, but it loses the sun quite early on in the day and frankly it's windy here!  We are smack dap between the local glacier and the Pacific Ocean, so we seem to always have a cool breeze.  We decided to take down the shed and build a garden room/green house.
Once planning permission was approved my husband started taking apart the garden shed, board by board.  
Between Ngaire and Michael the shed was apart in no time.  Ngaire and I had the fun job of pulling out all the nails and carrying the boards and plywood away.  It was a super hot day and I must admit those sheets of plywood are heavy!
The next task was to get rid of the grass and this sod cutter was just perfect for the job.
Michael had to move all the underground sprinkler lines from under what was going to be a gravelled area.
We were well into week three by the time we were ready for the gravel to arrive.  We had it dumped on our driveway.  We had to move it around the house, dodging the veggie pod and through the gate to the back garden.  This was no mean feat for Ngaire and I. 
Meanwhile Michael was leveling and setting in the base in place for the greenhouse.  Our plot tilts both sideways and forward and this proved to make his task slow to say the least.
Then it was dig, dig, dig to set the base and the concrete piers underground, inevitably he hit rocks, lots and lots of rocks.  Big heavy rocks....it seems we were plagued with rocks!
The base is set in place, the landscape fabric is spread and the gravel strewn about.  Now Michael is setting the steps in place.
We had decided to use some concrete slabs that we already had for the greenhouse floor.  We did have to buy more, but using what we had was a lovely bonus.  Ngaire was the floor setter and I was the gopher, keeping her supplied with pavers and sand.  She did an amazing job!

We were ready for the green house by the fifth week and then we waited and waited and waited.  We expected the greenhouse to arrive in six to eight weeks, the reality was much longer and we only got the greenhouse a week ago....but it's worth it!
The patio furniture fits in beautifully.
Sitting in this lovely warm space is going to make our winter so much more enjoyable, we get a lovely view down the garden and the trees in the distance.  What happed to all the garden tools from the shed?

Michael was able to reuse the hardiplank from the garden shed and build this wonderful shed to house some of our tools. It snugs right up to the house under the eaves.

Pretty nifty isn't it?

Tuesday, October 20, 2020

Pink and Blue Wool Throw on Twelve Shafts

On the last blog post about the pink and blue wool throw I had just decided/hoped that the 2/24 white Merino wool will work for the weft.  And thankfully it does!  I’m doubling the weft by using two shuttles that are being thrown from either side.  I was a little worried that I may mix up the shuttles but there is a rhythm to the movement of the shuttles that keeps everything organized.

I have to admit that I found weaving this throw a little difficult on a physical level.  Everything was just out of my comfort zone.  I used 12 treadles so a little leaning was needed to reach the outside treadles.  Also the throw was 34 inches wide in the reed, so I needed to lean a little to catch the shuttles, after giving them a good strong push to get them across the web.  

But it was worth it, the throw is really lovely.  The pattern is a 12 shaft advancing twill which creates some lovely diamonds.  I have used this pattern before for a scarf woven from 2/30 cotton.  It is quite a difference seeing this pattern on a much larger scale.

This throw actually wove up quite quickly due in part that it has been cold and rainy for most of the week and the fact that Mom needed the 14 dent reed for her next project; but there was no pressure from her to weave faster!

I did a couple of beauty shots before I have even washed the throw. It is wonderfully light and airy and  I think that it is really charming.  I can’t wait to wrap up in it on a cold winters night.


This last week it has really started to feel like autumn, although there is still only a touch of fall colour on the trees.  We’ve had a couple of days of mizzle, a combination of mist and drizzle, it is very dreary.  The only advantage to mizzle is that it does a lovely job of highlighting the spider webs, they look like jeweled necklaces.  The shrub is Berberis thunbergii 'Rose Glow'.

Monday, October 12, 2020

Louet Spring Loom Maintenance

Now that I’ve finished weaving the Fleur de Lis pattern, I have to move the heddles back to where they belong.  That means dealing with the dreaded ‘biting penguins’, so two birds with one stone is the way to go.  I took this opportunity to order some new heddles and some new texsolv cord for the loom and to do some overall maintenance.  I’m showing the maintenance routine for my Louet Spring Loom, but the same principle applies to any loom.

I decided to order 400 new heddles so that the next time I want to do an unbalanced weave again they will be there, ready and waiting.  Jane Stafford Textiles is just one Gulf Island away from me, so I got my parcel the next day, what a bonus.  I also thought that after twelve years of hard work, my loom deserved to have the cords on the spring mechanism replaced; so a 50 metre bobbin of texsolv was added to the order.  Hmmmm free shipping over $250 was just the incentive I needed to order these lovely skeins of 2/20 bombyx silk!

I started by lifting the loom up on four small step stools to bring everything up to eye level.  The loom is lightweight enough that this is an easy job.

I unfurled the front and back beams to check the condition of the texsolv cords and to ensure that the beam bar was level ~ it’s amazing how just a few centimetres off true can make a huge difference when weaving the fabric web.  I re-centred the cords on the beam bar to level it and it looks good.

I took off the texsolv cords from the spring tension apparatus and cut two replacement cords and attached them to the spring and around the guide and finally to the front of the loom.

I removed all of the treadle cords and checked each one for wear and stretching.  For my loom the short treadle cords measure 35 cm long (13.5 inches).  The long treadle cords measure 55 cm long (21 inches), so measuring was a good indicator of stretching.  I marked each one with sharpie to indicate which hole to button.  Since I have lots of texsolv cord now, I cut myself a few new cords of both sizes. 

 I asked my husband to use his soldering iron to melt the ends on each of the newly cut cords.  I now have 95 cords for each the upper and lower lamms and that should deal with even the most unbalanced of weave structures.  That sounds like a lot of treadle cords, but even a balanced weave on 12 shafts and 12 treadles takes 72 of each size.

I counted all the heddles and removed the hundreds of extras from shaft 2 and 3 and put them back to where they belonged and then I added the new heddles to the first 4 shafts.  I now have 150 heddles on shafts 1-4 and 125 on shafts 5-8 finishing up with 100 on shafts 9-12.  Whew that's a lot of heddles!

Now that the heddles were all in place I noticed that one of the shafts was riding higher than the others so it was time to go back to the ‘biting penguins’ and fiddle with the barrel screw on the shaft to align it with the others. 

 In this case I had to lower the penguin head one bead down on the cord and then loosen the lower part of the shaft, but it looks good now!

One issue I had begun to notice on my last couple of projects is that the treadle cord will sometimes catch on one of the screw buttons on the treadle and then I come to an abrupt halt which always catches me by surprise! 

This can be caused when one screw button is protruding a bit more than its neighbours.  I had Ngaire run her fingers over the buttons and then she tightened any that were outstanding.  Jobs a good’un!

Since I have the loom up on the stools I tied up my treadles for my next project, then down she came and onto my final jobs.

I replaced the beater and made sure that it was level.  If your beater is crooked, then your web will beat on an angle.  If it had been off true I would have inserted a small piece of thin cardboard under the reed to ensure its level.

Lastly I walked around the loom with a screwdriver and a wrench and check if any of them were loose, I’m always surprised that at least one or two screws need tightening.  A good vacuuming is the finishing touch.

Our garden is always surprising us, and one of the Trumpet Vines (Campsis tagliabuaa ‘Indian Sumer’) has produced a number of these huge seedpods.  They are the size of a small banana!

Monday, October 5, 2020

It Keeps Getting Bigger

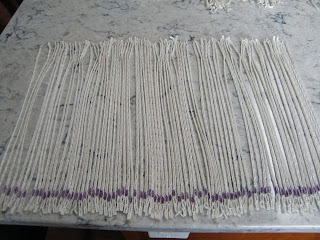
In the last blog post I had just pulled the 2/12 blue Merino wool for a throw.  I emptied the cone and there was less than half of what I needed for the throw.  So I pulled out a large cone of pretty pink 2/12 Merino wool.  After finishing this cone there still wasn’t enough so back to the stash.  I pulled out a small cone of dusty rose 2/12 Merino wool.  Finally I had enough threads for the throw but the dusty pink cone had such a small amount left on it that I decided to finish the cone and add it the throw.  The throw got wider by 2 inches.

The throw was planned to be blue with some random flecks of colour added to it.  Well, it now is a pink throw with blue edges.  The throw is over 900 threads so it took a lot of heddles and a lot of time to thread.  

I got to the end of the threading and I had 20 threads left over!  I did a recount of the threads just in case I had miscounted when I was pulling the warp.  And it turns out I had miscounted the dusty pink; each section had an extra 10 threads.  Back to the computer where I had to rework the threading and re thread.  The throw got wider by another 1 inch.

Originally I decided to sett the throw at 30 epi but when I had sleyed about 2 inches in a 15 dent reed it looked far too dense.  So I changed to 28 epi and used a 14 dent reed, but, I had forgotten to account for the change of sett when figuring out the width in the reed.  So I got to half way and realized that it wasn’t working and I had to start again and re-sley the reed.  The throw again got wider by 2 inches; the throw is now a whopping 34 inches wide!

I have tied on the warp and now gosh, doesn’t it look pretty.

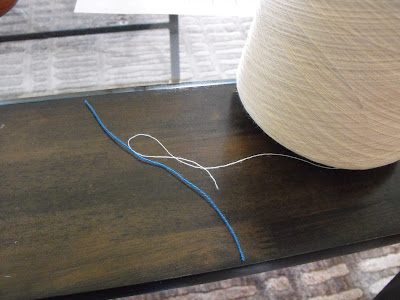
The plan for the weft was to use a large cone of 1/4 blue wool that was purchased at a Guild sale.  Well, a closer look at the fibre had us wondering; and it turns out it isn’t wool even though that's what is hand written on it.  The first hint is the sticker which says Wabasso, which was a large cotton textile company from Canada that made cotton sheets and other things.  After a burn test, it was confirmed, the cone is very definitely cotton.  

I’m not going to use the blue cotton, it would make the throw too heavy.  I’m going to be using this large cone of white 2/24 Merino wool.  I’m going to double it so it will be 4/12 which will match the grist of the warp.  Here's hoping it works because I'm almost out of options.

Final Garden Photo is a sunny yellow orange blanket flower called Arizona Apricot (Gaillardia aristata) with fall blooming Kaffir Lilies (Hesperantha coccinea ‘Mrs. Hegarty’).  The Kaffir Lily is a cousin to the Gladiolus with short spikes of large, brilliant hot pink, star-like flowers and oh so pretty!