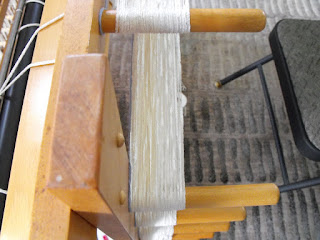
In the first half of the year my weaving study group looked at how to draft a motif using different weave structures, which inspired me to write the blogs on how to draft in Huck Lace, Summer and Winter and Diversified Plain Weave.
For the blogs I used an angel fish as the motif but for the study group my actual motif was a crown. I really liked the diversified plain weave version of the crowns so I wove it back in the spring. I didn’t post anything about it because I was thinking about seeing if Handwoven magazine would be interested in the project but the publisher for Handwoven magazine went into bankruptcy and nobody was sure what was going to happen to the magazine. Thankfully, the magazine has been saved by a new company called Long Thread Media which has been founded by Linda Ligon, Anne Merrow and John Bolton. I have decided not to send in this project because I don’t think that they would be interested in an 11 shaft, 14 treadle project as it is quite demanding.
I decided to do the diversified plain weave crowns as tea towels. The warp is unmercerized cotton in 2/8 and 2/16 in two shades of purple with the thinner grist being the darker shade of purple. It was a lot of threads and really hard to keep count.
The thing with diversified plain weave is that it can take a lot of heddles. There are two plain weave threads for every pattern thread. My crown pattern needs 11 shafts. I was able to use the extra shaft to ease the burden on Shaft 2 but there was 187 threads for Shaft 1 so I had to steal some extra heddles from another shaft plus I still had to make some extra string heddles.
The thin 2/16 threads are on the plain weave shaft 1, 2 (and 3 in my case). The thick 2/8 threads are on the pattern shafts 4 to 12.
For the weft I used gold unmercerized cotton also in 2/8 and 2/16. And hey, my pattern worked, I can see crowns!
I wove the pattern with the gold side up but I think that I like the bottom better with the gold crowns and purple background.
Here is the stack ready to have the hems hand sewn. The original plan was for four tea towels but they are so heavy and dense that they are better suited to be table runners. If I was going to weave them again as tea towels I would sett them looser, but it is hard to know with diversified plain weave what should the sett be because of the two different yarn grists.
These table runners are real stunners and they will make exceptional gifts for anyone who hankers for that royal theme!
Final Garden Shot is of a Hydrangea paniculata Vanilla Strawberry. The large flowers start off creamy white and fade into light pink then into dark strawberry red as the weather cools. So pretty!
Monday, September 30, 2019
Monday, September 23, 2019
Finishing the Piano Scarves
By the time I got to the third piano scarf I had the pattern memorized so it wove up quite quickly. I also think that the boat shuttle really helps with speeding up the weave time. It is a Little Man Howell which is 15 inches long, the bobbin is 8 inches and it can hold enough chenille to weave about 40 inches. I got it by chance with an AVL mechanical loom purchase, the loom is long gone but the shuttle has stayed!
I don’t do a lot of long warps so I was a little surprised by the thickness of the scarves around the cloth beam by the end; my knees were almost touching the roll.
After taking off the scarves for washing I noticed the thick layer of dust on the race of the (reed holder). After seeing that I went around my loom with the vacuum! Talk about dust bunnies!
After washing the scarves I put them into the drier with some towels and felt dryer balls. It's really nerve wracking but the softness and drape of the finished scarves is worth it.
The scarves then have their hems pinned up; here they are waiting for sunny days so I can have enough light to hand sew them. Here on Vancouver Island during the first week of September we had the average rainfall for the whole month. It has continued to be a dark and wet month, buckets of rain today again!
Here are the final beauty shots for a piano scarf. For Sale.
I haven’t shown you the final beauty shot for the yellow and red brown Tencel scarf (previous blog about it). It is really something very special and wonderfully autumnal. For Sale.
Final garden shot is a blue passionflower (Passiflora caerulea). Our neighbour has the original plant on the other side of the fence, but, since it has put runners into our back garden which have rooted, and now the runners are blooming, so I'm claiming it!
Labels:
Chenille,
Finished Project,
Plain Weave,
Scarf,
Shuttles
Monday, September 16, 2019
Leftover Handwoven Fabric
A number of years ago I took part in a handwoven card exchange and I wove this really lovely twill heart design using ruby and black tencel. I’ve had a fairly long piece sitting in the bottom of my fabric box since then, as I wove far too much, and this week I decided to do something with it.
I had enough to make three small drawstring bags by cutting pieces 10 inches wide by 17 inches long which were folded in half and pinned.
I did the same with lining; I want a fully lined bag.
Ironing the seams did prove a bit difficult, but my handy dandy point presser helped.
I want these small bags to stand up, so I seamed the corners to give them a flat bottom. I had a terrible time trying to see my seam line marks on this dark fabric. My solution was to put painters tape where I should sew. Odd I know, but it worked.
I did the same with the lining. To make sure my seams were the same size, I used a little triangle template I made from a post it note. I pinned it to the fabric lining up the sides and bottom and ran the painters tape along the top edge.
After sewing them together I ‘bagged it out’ or turned one inside the other through a small opening in the lining which I hand sewed closed later.
I top stitched as close to the seam as I could, then to make the channel for the cord I sewed a seam 1 1/2 inches from the top and then another seam 3/8 inch below that.
I used three strands 4/6 black yarn twisted together to make the draw strings.
These turned out exactly as I hoped, I’m really chuffed!
I’ve decided to finish up with the pie we made today. It is apple and green tomato mincemeat. The mincemeat was made from the tomatoes in my garden and is super yummm. The little hearts are sprinkled with sanding sugar for crunch.
I had enough to make three small drawstring bags by cutting pieces 10 inches wide by 17 inches long which were folded in half and pinned.
I did the same with lining; I want a fully lined bag.
Ironing the seams did prove a bit difficult, but my handy dandy point presser helped.
I want these small bags to stand up, so I seamed the corners to give them a flat bottom. I had a terrible time trying to see my seam line marks on this dark fabric. My solution was to put painters tape where I should sew. Odd I know, but it worked.
I did the same with the lining. To make sure my seams were the same size, I used a little triangle template I made from a post it note. I pinned it to the fabric lining up the sides and bottom and ran the painters tape along the top edge.
It turned out really well.
I put the lining inside the pouch, right sides together and pinned, matching the seams.After sewing them together I ‘bagged it out’ or turned one inside the other through a small opening in the lining which I hand sewed closed later.
I top stitched as close to the seam as I could, then to make the channel for the cord I sewed a seam 1 1/2 inches from the top and then another seam 3/8 inch below that.
I used three strands 4/6 black yarn twisted together to make the draw strings.
These turned out exactly as I hoped, I’m really chuffed!
I’ve decided to finish up with the pie we made today. It is apple and green tomato mincemeat. The mincemeat was made from the tomatoes in my garden and is super yummm. The little hearts are sprinkled with sanding sugar for crunch.
Monday, September 9, 2019
Piano Scarves
I meant to weave these piano scarves earlier in the year but I've finally got them on the loom now. In the spring I placed an order with Brassards for some more white chenille, as I didn’t have enough left in the stash do make a piano scarf warp; it really takes a lot of white chenille.
Last week when I pulled all the chenille out of the cupboard, I found that I had a little bit leftover from last time that I wove these scarves which was also from Brassards. So, I eyeballed the old cone to the new cone and it looked like it matched, you don’t really expect white to be that different. Well it was really different; the little leftover cone is really creamy next to the new chenille as you can see in the photo below. Unfortunately I didn’t find out until I had finished pulling my warp, while it wasn’t very many ends it was long, over 7 yards which is long enough for three scarves.
So I pulled everything off the warping board and started again. Although, I first had to check my math to make sure that I had enough white chenille for all three scarves. Luckily, I do have enough white chenille. After all that everything went smoothly and I have just finished my second piano scarf. Tomorrow I will start the third and final scarf.
I’ll show you the finished scarves next time. For now I have the creamy white chenille sitting on the mantle in the studio while I am trying to think of a cool project to do with it. I am hoping that I have enough to do a black piano scarf; I think that it would be cool.
Final Garden Shot is Himalayan honeysuckle (Leycesteria formosa). The plant is over 6 feet tall and the long burgundy bracts have both white flowers and purple/brown seeds that are edible and taste like treacle. The honey bees just love this plant; it blooms from late spring until winter.
Labels:
4 Shaft Weave,
Chenille,
Clasped Weft,
New Project,
Plain Weave,
Scarf
Monday, September 2, 2019
Eight Shaft Wild Silk Scarf
I am still working my way through the hand dyed warps I made last summer. It feels never ending!
This warp is wild silk with a grist of about 2/6 which I had originally dyed with small blue and white splashes, but when I got right down to it ~ I didn't really like it; so I re-dyed it deep turquoise and purple. I'm happy now.
I loved the tie up and threading that I used on the doublewide scarf I made for myself (see below), but wanted a different pattern.
So I used the same set up, but treadled it 1-12-1, nice and easy. I must admit that I'm really very pleased with the result. The scarf has 150 ends and it is sett at 20 ends per inch. The scarf is about 7 inches wide and will be about 75 inches long, excluding fringe.
Usually I seem to leap into my weaves with no real idea about weft, but this time there was only one weft on my mind.
I chose to use 2/8 tencel in red/purple, what I think of as magenta. It really works well and the pattern just gleams against the dull raw silk.
This is the final 'warp in waiting' and just so I don't forget about it I have it sitting front and center on my castle. I am still pfaffing about doing it though ~I have a plan for some deflected doubleweave that I really want to start, so it may get tucked away for later.
I have a wee dark, moist corner in my garden that sits in the lee of a fence on the north side. It's a perfect place for a small fernery. Here is my current favourite fern front and centre; Polystichum setiferum 'Divisilobum' commonly known as an Alaska Fern. This photo does not really do it justice as it is stunning in its symmetry with each frond swirling out from the centre.
Subscribe to:
Posts (Atom)