Showing posts with label Inlay. Show all posts

Monday, October 21, 2019

Weaving To Frame

I have been home for a couple of weeks now, and I’m ready to jump back into my weaving.

South central Spain was amazing and The Great Mosque of Cordoba was probably one of the most beautiful things I have ever seen.  The Great Mosque was begun in 784 and when the Christians conquered Cordoba in 1236 they built a cathedral within the existing mosque.  This place is massive and the Cathedral was built without demolishing the existing Mosque, it is a stunningly beautiful and wonderful place.  The other places that were beyond expectations were The Royal Alcazar in Seville and the Alhambra in Granada, but after weeks away, it’s always nice to be home.

Now back to what is on my loom.  I belong to a study group within our guild, called Exploring More and our challenge this time is to design, weave and frame a piece that could be displayed on a wall.  Sounds easy, right?  I thought so too when I suggested it.
I started looking for things I wanted to weave and the more I thought about it, the less sure I became.  Finally, in a bid to get something on the loom I put on a natural 2/16 cotton warp 2 yards long with 280 ends, 10 inches wide on the loom and sett at 28 epi.
I threaded the loom in a 1-2-3-4 twill and tied up the loom with some options.  Then I went to Spain to enjoy the sunshine.  I have tied the treadles to weave plain weave, treadles to weave twill, treadles to weave dukkagang and treadles to weave basket weave.  I know, I’m really hedging my bets!
Now that I’m ready to begin I went searching for something that would look good on my studio wall; and since I love flowers I started there.  In my dining room I have a lovely watercolour of tulips and that was my inspiration.  I love that this painting is just a suggestion of tulips rather than being too literal, so right up my alley.
I still wasn’t sure how I wanted to weave the tulips so I took some coloured sharpies to the warp to rough in the general shapes.
I’m sorry that I didn’t photograph my efforts so far, but first I started just laying in colour in the general shapes I wanted using the Italian inlay method.  It just looked lumpy and bumpy, so that came out.  Then I started laying in colour blocks in a tapestry method and that was just far more work than I was willing to do, so it has all be pulled out too.

As it stands right now, I will use the natural 2/16 warp cotton and just weave this off as plain weave, then I plan to paint over my rough outline and perhaps do some embellishments.   Hmmm, I have a feeling that going at this all loosey-goosey wasn’t the best idea.  I still have lots of warp to play with, so that's my task for the next few weeks.

The garden shot today is a photo of one of the front garden beds in full autumn glory. It is Dwarf Fothergilla (Fothergilla gardenii 'Mt. Airy) with Japanese Silver Grass (Miscanthus sinesis 'Sarabanda' in behind.

Wednesday, May 10, 2017

Clasped Weft with 8 Shaft Undulating Twill

This is another post of a forgotten project from when I was a part of a study group on Inlay last year. While technically Clasped Weft isn’t Inlay you can use it to get a look very similar to Inlay without all the problems.
The scarf warp is 2/8 Tencel in Straw and I choose a simple undulating twill for the pattern.  Clasped Weft is usually done with plain weave but I wanted a more interesting design; but it had still had to be simple.

I used two end feed shuttles that had 2/8 Tencel in Straw and a small bobbin with thick and thin hand dyed Silk in various shades of oranges and golds.
The centre panel of the scarf is the orange silk that is clasped to each side of the scarf.  I gently pulled the warp threads apart to place the silk bobbin inside of the shed.
I would then pull the bobbin to the right side and then back to the left while unraveling thread to create a loop.  Leaving the bobbin on the left side of the warp.
Then with the shuttle from the right side throw the shuttle to the left side, then clasp the silk and throw the shuttle back to the right side.  Be careful to miss the floating selvedge on the left side but use the one on the right.
With the clasped silk thread you can manipulate it to where you want each particular pick to lay.  Set the pick with a gentle tap of the beater.
That is only half of the pick done, now move silk bobbin back through the shed to the right side creating a second loop.  Use the shuttle from the left hand side and capture the silk loop.  And pull the clasped weft into position on the left side.  Set the pick with a gentle tap of the beater.
    
Last step is to remove the silk bobbin from the web.  Then you can change to the next treadle and start everything again.  If that seems like a lot of steps and time, well it was!  It took me about an hour to do one inch!  Near the end of the scarf I was able to go a bit faster and do two inches per hour. Tedious doesn't even begin to express it!
I didn’t have a plan on where I wanted to have the orange silk, but I did have a couple of rules that I followed.  I didn’t go past one inch from the edges and I used the strong pattern changes to help hide to clasped weft loops.
The twill pattern became a texture because each pick was a double thread pick.  The texture is still part of the scarf even after washing and steam pressing the scarf.
The scarf is incredibly graphic and it really showcases the variegated orange silk beautifully.
But it is a very time consuming scarf so I don’t see doing another one ever again!  For Sale.
Final Garden Shot is the Fothergilla in bloom, it has loads of sweetly scented bottlebrush blooms.

Sunday, June 19, 2016

Table Linen in Inlay and Goose Eye Twill

I’ve joined a study group with the Qualicum Weavers and Spinners.  The group is called Exploring More and we are study Inlay.  Mum has already done two projects with Theo Moorman, one with a plain weave ground cloth and the other with a twill ground cloth, that she hasn't blogged about yet.

I have chosen to do a table linen project with classic inlay.  Inlay is a finger manipulated supplementary weft that doesn’t weave selvedge to selvedge.  There are various techniques that create different patterns, examples of some can be found here from a Transparency workshop that I did.

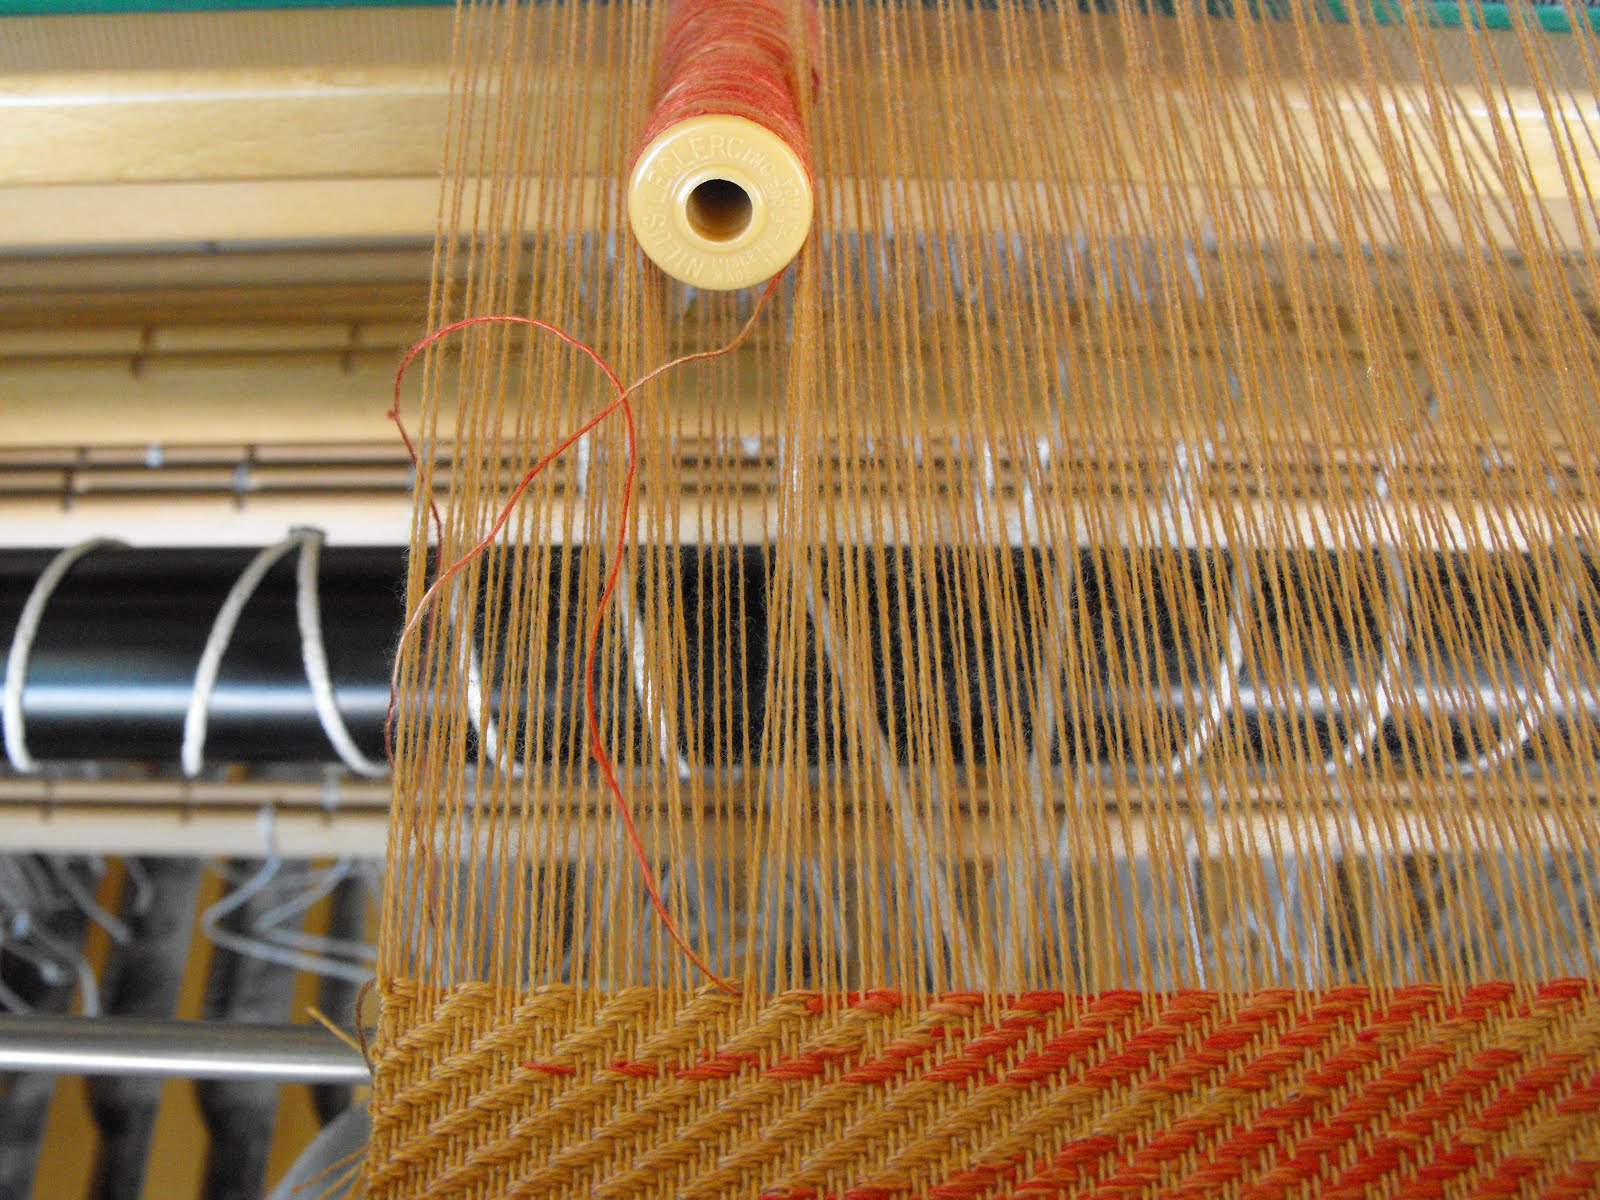
The warp is 3/10 buttercup yellow from Dressew, a fabric supply store in Vancouver, which I have never used it before.
The pattern is four shaft goose eye twill blocks but I have extended it onto eight shafts as I didn’t have enough heddles on the first four shafts.  I’m amazed at how complicated the pattern is, with only four shafts.  The weft is the same buttercup yellow as the warp so that pattern has an embossed effect. Finding an ilay weft was a bit more problematic because I wanted the inlay colour to really pop.
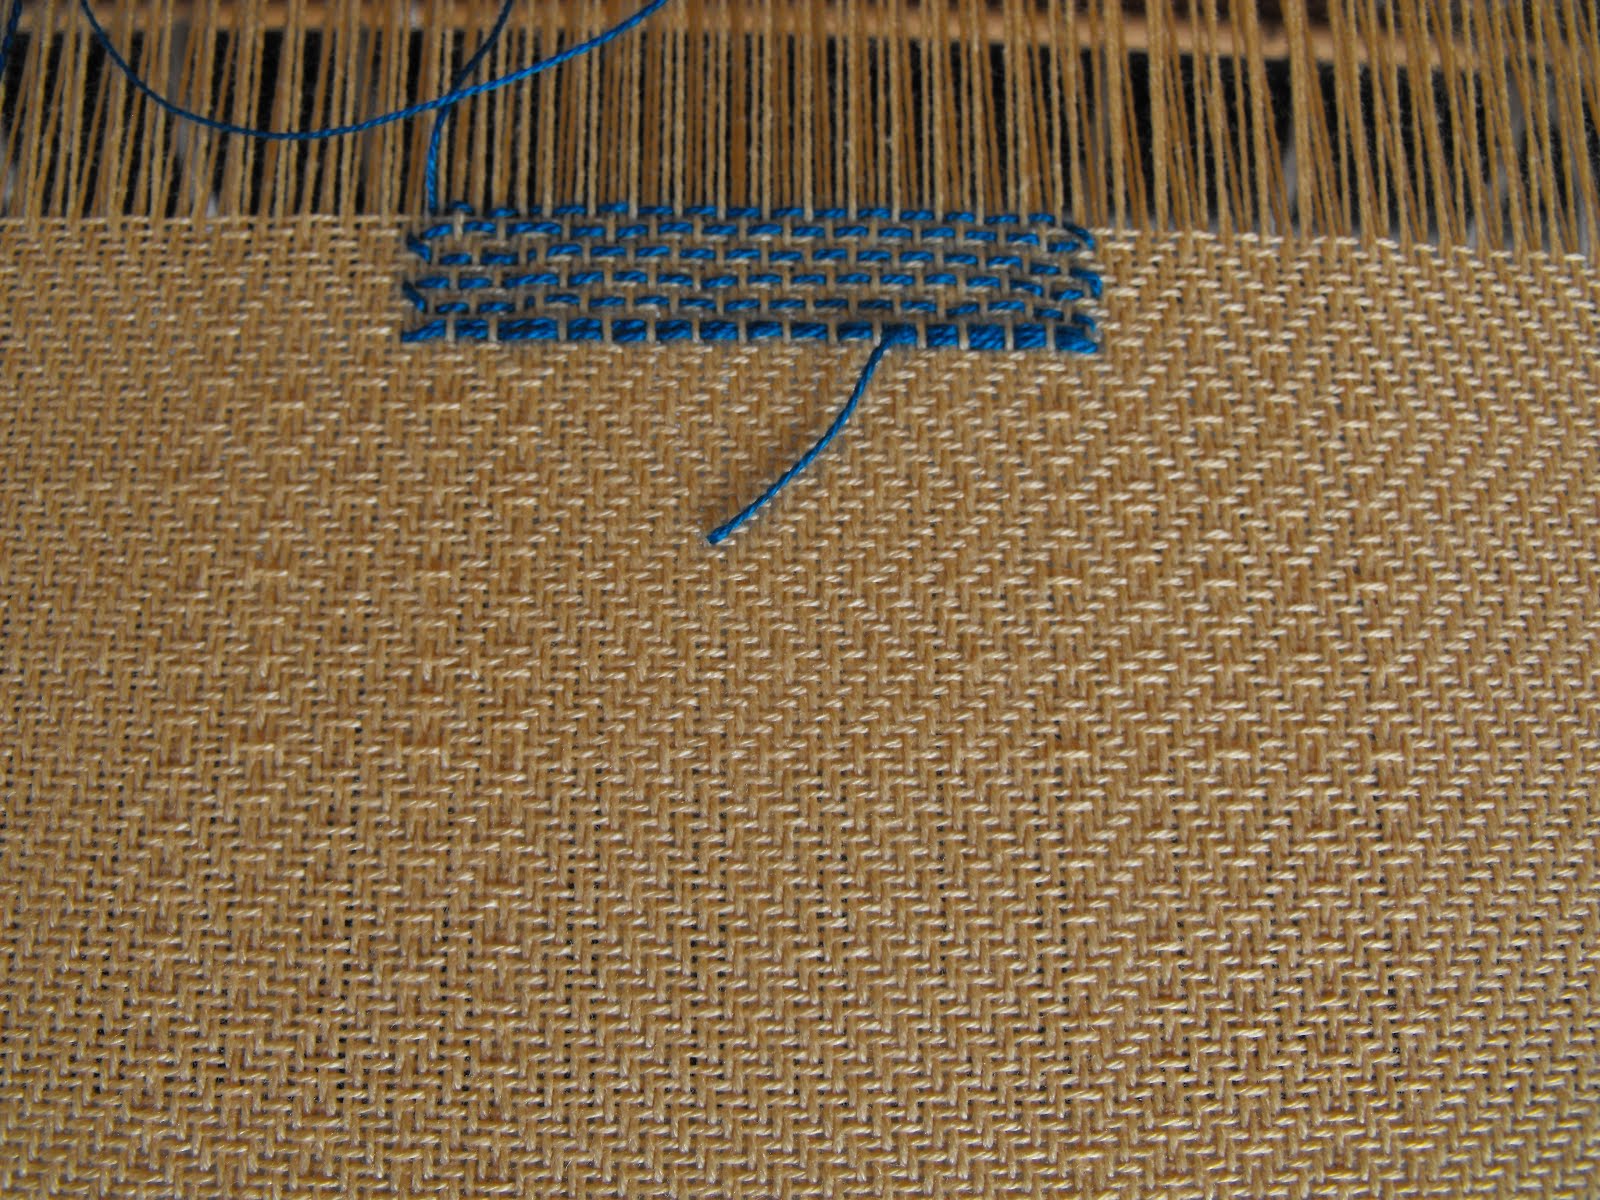
I used Orlec for the Inlay thread because it doesn't shrink, which means that the squares wouldn't pucker.  I picked a bright blue Orlec for the inlay colour, and its way too bright!  You can also see that I wasn’t sure on how to secure the end of the inlay.  It was three layers deep at the end and looks very funny.  You can’t see it but I also didn’t make my inlay thread long enough!
I auditioned two shades of grey Orlec and I am going with the darker of the two.  You can’t really tell but my beat changed during the inlay into a heavier beat that I liked better.  So I unwove everything; all five inches so I could start again to get my beat perfect.
The grey Orlec is the right choice, the blocks are highlighted but don’t overwhelm that rest of the table linen.
The inlay technique that I picked was Ryss Weave with two picks of the ground twill between each inlay.  I like the offset stacking and the long three thread floats.  To secure the inlay I did a double pick at the beginning of the square and at the end.
Here is the finished table linen, sorry about the colour but it’s raining this afternoon.  The inlay squares add interest, and although you can’t see in the picture the goose eye and twill blocks really shows up.
This is a close up and you can see the goose eye and twill blocks a bit better.  You can also see that I didn’t quite get the inlay squares right.  They all have a section that is inside the goose eye portion. So I guess the table linen is mine now!
This picture is off the back piece.  The inlay just peeks through onto the back, which makes it a one sided weave structure.
The take away of Inlay for me is that it is a pretty but there is a big drawback.  I’m not sure that the inlay blocks are going to stay in place when the table linen is washed again; will the Orlec slowly work its way out?

I don’t know and it is something that worries me about the piece.  I thought about putting a little bit a Fray Check on each end, essentially gluing it into place, but it slightly changes the colour of the Orlec; or, I could sew some beads to anchor the ends but then how do you press flat?

I think that Inlay isn't suitable for items that I'm going to sell, there is too much of a question mark about how the Inlay will behave through use.  But I did discover how much I like the cotton from Dressew!

Final Garden Shot is Campanula Garganica 'Dickson's Gold'.  It really is lime green with pale blue flowers and it is just stunning.