I added the six string heddles needed for my extra threads to fix my drafting mistake, it is very quick and easy and described in my last blog. I now have a lovely collection of threads hanging off the back of the loom. To keep the threads from tangling I use a piece of cardboard with thin slits to keep the threads in line.
I started weaving again after re sleying and re hemstitching. I stepped back to take a picture before the design goes around the cloth beam and it is looking pretty good.
Then Mum notices some doubled threads in only one area of the pattern. It goes for about three inches; starting where I had begun weaving in the morning.
On the underneath of the shawl you can see that there is a long float. Sorry for the blurry photo it was a little awkward to photograph upside down.
When I am finished a weaving session, I place my hanging threads on top of the castle of the loom to prevent them from untwisting or breaking. Somehow, in the morning when I dropped them down to begin weaving again I had overlapped a hanging thread with a thread on the warp beam and the threads twisted together making this mistake.
After unpicking the three inches I fix the overlapping threads and could really start to weave this stunning pattern. One of the interesting things about Crackle is that there can be very large pattern repeats and for this shawl that pattern repeat is thirteen and half inches!
After all the drama at the beginning; actually weaving the shawl went quite quickly. Then I had to choose the weft for the next shawl. I had a choice between a pretty blue 2/16 bamboo and 2/20 red Tencel.
I was worried that the blue was too pale to show the pattern, so I picked the red and it is a stunner! This time the pattern looks like the draft because I started the treadling sequence from the other side! Lovely.
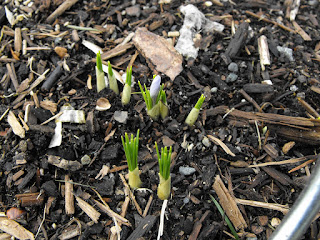
Final Garden Shot is some tiny bulbs that are just starting to bloom. What a hopeful sign of Spring, I am ignoring the weather report that says that we could get some more snow on Friday!
Wednesday, February 22, 2017
Friday, February 3, 2017
Tying a String Heddle
Surprisingly I have never had to tie a string heddle before but I made a drafting mistake with my Crackle shawls. I need to add six threads but with 852 threads I am not going to re-thread the entire warp!
So to start you need a strong piece of thread, I am using pink 2/8 cotton. You don’t have to use pink, but it sure is pretty! You will need a piece that is double the height for your harness plus a couple of inches for the take up from the knots.
Loop the thread over the bottom of the heddle. Straighten up the ends of the soon to be string heddle. Push one of the existing heddles on the shaft nearby as you will need to measure off it.
Make an overhand knot in the string heddle that lines up to the bottom of the eye in the heddle that you are matching. Make sure that the string heddle is held taut, not loose.
Do a second overhand knot above the first on; it will close the eye of the heddle. It is important that the loop you are making also matches up with the eye of the heddle that you are matching.
Last step is to go around the top of the heddle and tie two knots to hold the string heddle in place. Make sure that the string heddle is tied not too loose or too tight; you want it to slide across the harness but not to be sagging.
The last step is to trim the long tails above the knots so they don’t get tangled in the other heddles.
The string heddle is now ready to use. Well I guess the very last step is thread the heddle!
Final Garden Photo is Sweet Box (Sarcococca) it is just starting to bloom and it has a lovely strong vanilla smell.
Subscribe to:
Posts (Atom)


