I have done a little renovation on the Minerva; here is a picture of what was taken off . . .
 Now a picture of the new and improved Minerva . . .
 The sectional parts from the first back beam and the second back bar were taken off, because I have been having tension problems. The problem came from when each one inch section was wound; it was wound at a different tension. So I have changed to the same style of back beam as my Mum’s Louet Spring.
Also I am using the same warping method as her. An old raddle was found and I spent a morning sanding off the burrs. The raddle was then tied to the castle of the little Minerva. As you can see it came from a larger loom but it worked!
 This was the loom waste, it was for the entire scarf, ok, I had a little bit more from the trimming of the fringe but it was just a little bit more. My last project, the blue Finnish lace runner, the loom waste was huge and shameful. For this alone the renovation was worth it but there is more good stuff to come!
  For my project I chose to do Bead Leno again. I went with perled mercerized cotton that was hand dyed with lime green and yellow. It was a little elastic and that made for a strange effect as I was weaving. Some of the twists relaxed and flattened out, I had no idea what the finished scarf would look like.

 Now at the end of the warp, I was amazed by the shed that I was able to get. Instead of having to finish weaving when the first knot reached the top of the back beam, I was able to weave until the back bar reached the back of the heddles. It was fantastic!

 The new weaving skill that I learned with this project was hem stitching. I really like the finish. Hopefully I will remember how to hem stitch for the next project!
 After washing the scarf the sticky fringe made lovely long corkscrews so I had to do a fringe finish that would keep the threads seperated. Four threads knotted at one inch with two green seed beads.
 The finished project was a total surprise, the scarf looks totally different from my other Bead Leno scarves. Parts of the warp collapsed and others over twisted which makes for a very interesting texture.


 I made a necklace scarf!

Now a picture of the new and improved Minerva . . .The sectional parts from the first back beam and the second back bar were taken off, because I have been having tension problems. The problem came from when each one inch section was wound; it was wound at a different tension. So I have changed to the same style of back beam as my Mum’s Louet Spring.Also I am using the same warping method as her. An old raddle was found and I spent a morning sanding off the burrs. The raddle was then tied to the castle of the little Minerva. As you can see it came from a larger loom but it worked!
This was the loom waste, it was for the entire scarf, ok, I had a little bit more from the trimming of the fringe but it was just a little bit more. My last project, the blue Finnish lace runner, the loom waste was huge and shameful. For this alone the renovation was worth it but there is more good stuff to come! For my project I chose to do Bead Leno again. I went with perled mercerized cotton that was hand dyed with lime green and yellow. It was a little elastic and that made for a strange effect as I was weaving. Some of the twists relaxed and flattened out, I had no idea what the finished scarf would look like.Now at the end of the warp, I was amazed by the shed that I was able to get. Instead of having to finish weaving when the first knot reached the top of the back beam, I was able to weave until the back bar reached the back of the heddles. It was fantastic!The new weaving skill that I learned with this project was hem stitching. I really like the finish. Hopefully I will remember how to hem stitch for the next project!After washing the scarf the sticky fringe made lovely long corkscrews so I had to do a fringe finish that would keep the threads seperated. Four threads knotted at one inch with two green seed beads.The finished project was a total surprise, the scarf looks totally different from my other Bead Leno scarves. Parts of the warp collapsed and others over twisted which makes for a very interesting texture.I made a necklace scarf! I owned a really nice Swedish pirn winder for a while, but found the vertical mount didn’t work for me, so back to this Leclerc horizontally mounted one. I have my bobbin (pirn) winder mounted on the Leclerc Holdsall which is a great little piece of equipment. The cone of yarn sits below on a shelf balanced on a hollow peg and the yarn is fed through a series of holes that bring it right up to the bobbin. The true function of this set up is as a doubling stand as there is another identical shelf below my yarn which will hold another cone, which is fed up inside the first tube and then they can be wound together to double your yarn.
 You thread your yarn into the center of the pirn and then shove it on the bobbin winder. The thread is held firmly in place.
 Sorry this photo is a bit blurry, mea culpa! You then bring the yarn up through the notch and start winding. No more fiddling around to get it started. Perfect!
 When the pirn is wound, keeping the yarn in place in the center you mount it into your end feed shuttle. I really can’t believe I didn’t figure this out yonks ago!
 Here’s my pretty pirn! Of course this works with a regular bobbin too....eazy peazy!
 To make the stash reduction happen I decided to weave a rug or saddle blanket in Flame Point Twill with dimensions of about 32 inches by 32 inches; seems a simple enough plan and it will use up lots and lots of my wool!
 Here it is as a pile of loom! Why do they never come with instructions or photos?
 The loom comes with heddle horses or these bars from which to hang the shafts - I've chosen to use the bars. Frankly the horses scare me!
 Now to figure out what to make with it? My first step was to look up the suggested sett for 4/8 cotton and found that the sett guidelines are 16 epi for tabby, 18 epi for twill and 20 epi for lace weave. I then measured the width at which the warp was beamed, and it came out to 27 inches. So dividing the ends by the width, that means that it was beamed at 12 epi – what the heck could I make? Well, when life hands you warp - make placemats! If I changed the sett to 20 epi that would give me 15-3/4 inch wide very firmly woven placemats – sounds good to me, especially because I have some 4/8 cotton I can use for the weft.
  Now for something completely different!
 We went for a drive to Salmon Arm yesterday and came home with these lovely boys. They are handmade in South Africa with glass beads and baling wire.
  Now we are five! Stop me, stop me now!


 I thread a needle with a piece of weft that was twice as long as the fringe. Insert the needle up catching the hem stitching.
 Then back down under the hem stitching to lock the thread in.
 Pull until the weft thread is even with the bottom of the existing fringe.
 Now twizzle as usual; I think that the beaded effect is really lovely and it makes the fringe more united with the scarf as a whole.
 I also try and make the fringe a point of interest, so in this case I twizzled the bouts with the introduced weft threads singly, but twizzled the solid black bouts doubled, so now I have a thick and thin fringe on the purple scarf below. The photo below is before I've trimmed the fringe or pressed, so believe me it did improve!
 On the raw silk magenta scarf I did groupings of 3 coloured, 5 black repeated along the fringe with no doubling of bouts, so although the scarves are essentially the same, they look very different.
  I really want to get this scarf in my hands so that I can start beading the fringe, so I decided to do try a new technique for me. I have had the instructions to make a 2 Stick Heading since 2002 and thought now was the perfect time to try it. First weave an inch of plain weave or as close as you can get to plain weave. Choose a non slippery yarn for this, one with lots of fuzzies, I used 2/10 merino wool.
 Insert a stick in one plain weave shed, insert another stick in the next plain weave shed. I used sticks that came with my loom, but any smooth flat stick will do.
 Now weave another inch of plain weave.
 As I cut the web, the warp did pull back a bit and I got a bit scared, but the 1 inch of wool kept everything in place. I removed my first scarf from the cloth beam and pulled the cloth beam back over the breast beam.
 Fold the sticks against each other with the first inch of heading folded underneath.
 I moved my warp forward so that the apron rod was just below my front beam and then I tied the two folded sticks to the front apron rod at about 3 inch intervals, keeping everything even. I just moved the warp threads to make small holes in the web as I needed them.
 All done….perfect tension…..ready to weave in about 20 minutes!!!! I forwarded my warp to allow for my 12 inch fringe and started my new scarf. Same tie up and threadling but I’ve changed the weft. I’m now using magenta raw silk that I purchased as a single and plied together. It looks quite different and is a little bigger grist.
 Do you see the almost butterfly in the pattern? I'm going to have to work on that and see if I can make it show up more.
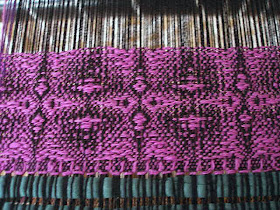

 The warp is 2/20 hand dyed bombyx silk, and the pattern I chose is a fancy 8 shaft twill that has lots of treadling and tie up options. The pattern is from Twill Thrills and is called Frost Crystals in Twill by Doramay Keasbey.
 I love it! The real benefit to this pattern is that you can change the tie up six different ways and even though you treadle the same, you can achieve six very different scarves. I may just have to try them all!
 The first 15 inches wove very quickly and as it wound around the cloth beam I thought I’d show you what I use so that the metal rods and knots don’t ruin my woven web. Even though my knots are small my metal rod is large as you can see, so that if I don't protect my weaving there would be some distortion.
 I use a 12 inch wide piece of corrugated cardboard and insert it between the web and the cloth beam the first time the web goes around.
 Protecting your web makes a real difference to the condition the weaving is in when you unwind it from the cloth beam. Here is the cardboard in place, nice and snug.
 On another note: